Prepping meals on a yacht comes down to four moves: prioritize what spoils fastest, choose ingredients that pull double duty across several dishes, precook or vacuum-seal three days of meals before you leave the dock, and lean hard on one-pot recipes once you’re underway.
Here’s the one-line boarding plan: buy and stow provisions by category (refrigerated, frozen, pantry, fresh), front-load your prep so the busiest cooking happens before you cast off, and label every portioned meal with its date and contents. Charter chefs who plan menus for a living build around the same constraint you’re facing, whatever the size of the boat, and one rule dominates their thinking: leafy greens and soft produce start breaking down around day four, so they get eaten first and everything hardy gets saved for later. Sailarmada builds its own crewed itineraries around this same logic, front-loading fresh menus early in the week and shifting to pantry-based cooking as the trip goes on.
- Buy and sort by storage category before you even think about recipes.
- Stow the heaviest, longest-life items low and central for stability.
- Precook or vacuum-seal three days’ worth of meals before departure.
- Build your menu around one-pot dishes once you’re moving.
Pro Tip: If you can only add one piece of gear to a small galley, make it a pressure cooker or a compact vacuum sealer. The pressure cooker locks its lid so nothing spills in a rolling sea, and the sealer lets you portion and freeze meals that would otherwise spoil in half the time.
Key Takeaways
Meals on a yacht come together when you provision by perishability, front-load your prep, and build the menu around one-pot, make-ahead dishes suited to your galley’s real capacity.
| Point | Details |
|---|---|
| Sort by storage category | Separate refrigerated, frozen, pantry, and fresh produce before you leave the dock. |
| Follow the perishability order | Eat leafy greens and soft produce in the first two to four days; save hardy vegetables for later. |
| Front-load your prep | Precook and vacuum-seal 48 to 72 hours of meals before departure to cover early passage days. |
| Match menu to galley specs | Confirm hob, oven, and fridge capacity before planning anything beyond simple one-pot meals. |
| Plan for refrigeration failure | Keep a shelf-stable emergency stash and know your consume-first order if the fridge quits. |
For a hands-on way to put all of this into practice, a crewed or skippered charter takes the provisioning guesswork off your plate entirely. Sailarmada’s private and group sailing holidays come with itineraries built around real galley capacity, so the menu always matches the boat, whether you’re planning a relaxed family week or a livelier group trip across the Mediterranean.
Table of Contents
- How Do You Plan Yacht Meals by Storage Category?
- What Galley Gear Actually Matters Aboard a Small Yacht?
- How Should You Plan a Menu Around Your Galley’s Capacity?
- What Are the Best Make-Ahead Meals for a Yacht Galley?
- How Do You Cook Safely When the Weather Turns?
- How Do You Keep Food Safe Without a Full-Size Fridge?
- How Should You Organize Food Storage on a Small Boat?
- What Should a 7-Day Yacht Provisioning List Look Like?
- How Do You Clean Up and Manage Waste With Limited Water?
- What Really Works After a Few Days of Rough Cooking
- Where to Learn More About Provisioning and Galley Safety
- Frequently Asked Questions
- Sources
How Do You Plan Yacht Meals by Storage Category?
A provisioning list only works if it’s organized the way your boat is organized: by where things go, not by recipe. Split every purchase into four buckets before you hit the dock, and the whole trip gets easier to manage.
Refrigerated items cover dairy, cooked meats, and anything you’ll eat within the first few days. Frozen items are your insurance policy: proteins, pre-portioned sauces, and bread that you pull out as the fridge empties. Pantry staples are canned goods, rice, pasta, oils, and shelf-stable snacks that survive heat and motion without complaint. Hardy fresh produce — think cabbage, carrots, onions, apples, and citrus — bridges the gap between fresh and canned, often lasting a week or more without refrigeration.
The perishability hierarchy matters more than most first-time provisioners realize. Leafy greens, berries, and soft fruit belong in the first two to four days of your menu; root vegetables and cabbage can sit in a cool locker for weeks. Plan your week’s meals in that order, not by what sounds good on paper.
- Sort every purchase into one of the four storage categories before loading the boat.
- Sequence your menu so soft, fast-spoiling produce gets eaten in days one through four.
- Remove cardboard and excess packaging at the dock. It attracts moisture and pests, and it takes up locker space you don’t have.
- Repack items into vacuum-seal bags or hard, stackable containers, and label each one with the date and intended meal.
- Flag dietary restrictions early and shop a separate small bag for allergy-safe or restricted items so they don’t get mixed into shared stock.
A rough packing guide per person per day: one to two pieces of fruit, one serving of vegetables beyond what’s in the main meal, one protein portion, a carb base (rice, pasta, or bread), and two to three liters of drinking water beyond cooking use. Double the pantry snacks if you’ve got kids or long passage days ahead, since bored crew eats more.
If someone aboard has a dietary restriction, don’t try to cook two separate menus. Build the base meal to be naturally compatible (a vegetable-forward stew, a grain bowl with proteins added separately) and stock a few substitution items, like a gluten-free pasta or a dairy-free milk, that slot into the same recipes everyone else is eating.
What Galley Gear Actually Matters Aboard a Small Yacht?
Not every piece of kitchen gear earns its space on a boat where every cubic inch is contested. Split your gear list into three tiers and you’ll stop wasting locker space on things you’ll use once.
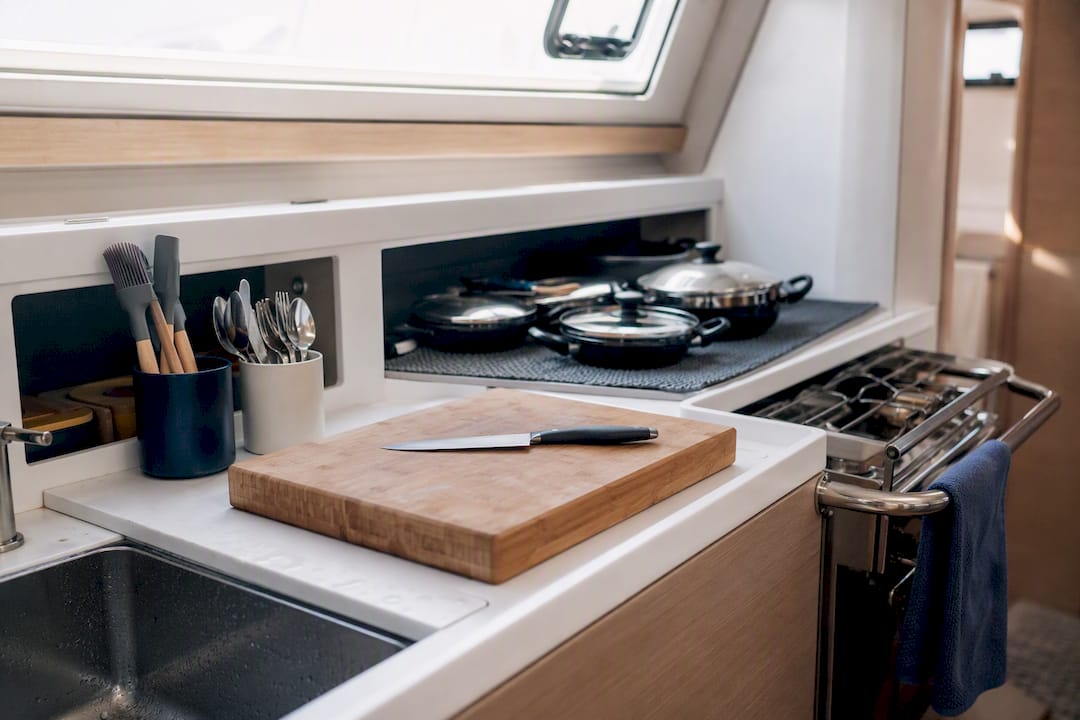
Must-have gear: pot restraints or a fiddle rail, a gimbaled stove if your boat has one, one or two genuinely sharp knives, and pots with locking or tight-fitting lids. These aren’t upgrades. Gimbaled stoves keep pots level as the boat rolls, and non-slip mats plus lidded pots are what actually prevent a spilled pot of boiling stew from becoming a real injury.
Should-have gear: a pressure cooker, a vacuum sealer, and one sturdy, heavy-bottomed skillet. The pressure cooker alone changes what’s realistic to cook offshore, since its locked lid means you can walk away from it in a rolling sea without babysitting a simmering pot.
Nice-to-have gear: a small marine oven, an electric kettle, or other powered appliances, assuming your boat’s electrical system can support them. This is where power budgeting matters. Air conditioning and other high-draw systems can outpace propulsion as the single biggest energy user aboard in some conditions, so an electric appliance that seems minor at the dock can matter a lot at sea.
- Choose pots and pans sized to actually fit your stove’s restraints, not just what looks good in the store.
- Favor propane or induction over anything requiring a dedicated generator run, unless your boat is built for it.
- Keep water use in mind when picking gear: a pressure cooker that locks in moisture uses less water than an open simmering pot.
Pro Tip: Before you buy anything new, photograph your actual galley setup, stove burners, oven size, fridge depth, and all, and use that photo to sanity-check every gear purchase and every recipe you’re planning to cook.
How Should You Plan a Menu Around Your Galley’s Capacity?
Charter chefs who cook aboard yachts for a living all follow the same first step: they ask for a photo of the galley before writing a single menu. Confirming exact hob, oven, and refrigeration capacity in advance prevents the classic rookie mistake of planning a four-course dinner for a two-burner stove with no oven. Do this yourself before you shop, whether you’re the cook or you’re briefing someone else.
Timeline discipline matters just as much as the menu itself. Plan your most complex cooking, baking bread, marinating and grilling, elaborate sauces, for the first calm day or two, ideally while you’re still near shore. As the trip progresses and weather becomes less predictable, shift toward the meals you precooked and vacuum-sealed before departure. Bluewater cruisers who’ve done long offshore passages call this the front-load rule: prep is concentrated into the 72 hours before a passage begins, not spread evenly across the trip.
Your boat’s size and galley spec set a realistic ceiling on menu ambition. A small sailboat with a two-burner stove and a cooler box is a cold-and-casual boat: sandwiches, salads, and one-pot meals. A mid-size yacht with a real stove and oven can handle grilled proteins and baked one-pot dishes. Larger crewed yachts with a professional galley can support genuine multi-course dining, which is part of why charter dining formats like anchored lunches, sunset canapés, or full-day catering exist as distinct pricing tiers in the first place.
If you’re chartering with a chef or crew, the planning conversation goes both ways. Brief the chef on your itinerary and any dietary needs, coordinate market runs around your anchorages, and clarify upfront who’s responsible for drinks and ice, since that’s a common gap that leaves guests improvising.
Menu ambition should never outrun the equipment cooking it. A galley photo sent ahead of time saves more disappointment on day one than any recipe swap ever will.
Pro Tip: Save your most ambitious cooking for forecasted calm windows, and keep a couple of good thermoses or insulated containers aboard. They let you cook a hot meal in the morning calm and serve it safely hours later, without reheating over an unsteady stove.
What Are the Best Make-Ahead Meals for a Yacht Galley?
The single biggest shift in how comfortably you eat aboard is moving from “cook every meal from scratch” to “reheat something you already made properly.” One-pot dishes are the backbone of this approach, because they cook in a single vessel, reheat evenly, and don’t demand precise last-minute technique while the boat is moving.
Stews and braises are the most forgiving option. A beef or lentil stew, built with hardy vegetables that hold their texture, improves after a day or two in the fridge and reheats in fifteen minutes on a single burner. Curries work the same way and travel especially well vacuum-sealed, since the sauce keeps proteins moist through freezing and thawing. Chili is nearly indestructible, freezes flat in vacuum bags for easy stacking, and can be dressed up or down depending on what’s left in the pantry by day five. Pasta bakes need slightly more care (pasta can go mushy after freezing) but hold up well if you slightly undercook the pasta before assembling. No-knead pot bread, baked in a Dutch oven or a stovetop pot with a lid, is worth learning if your galley has any kind of oven, since fresh bread is one of the biggest morale boosts on a multi-day trip.
If you own a pressure cooker, all of the above cook in a third of the time and use less fuel, and the locking lid means you’re not bracing a pot against a rolling sea while it simmers.
Batch-cook with a clear portioning target in mind:
- For a 24‑hour buffer, prep two to three meals’ worth, enough to cover dinner and one backup.
- For a 48‑hour buffer, prep four to six portions across two different dishes, so crew doesn’t eat the same thing twice in a row.
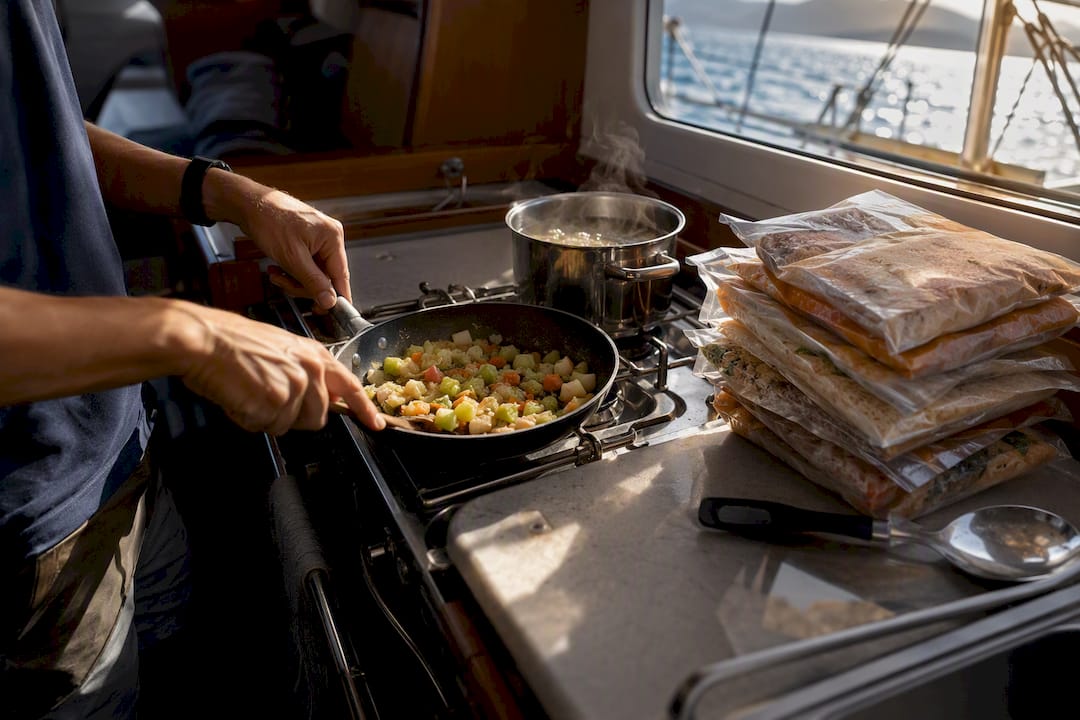
- For a 72‑hour buffer, the front-load rule cruisers swear by, prep six to nine portions before departure, vacuum-sealed and dated, covering the entire first offshore leg without a single from-scratch cooking session.
Vacuum-sealing is what makes this work at scale. Portion meals into single-serving or family-size bags, remove as much air as possible, and freeze flat so bags stack efficiently in a small freezer. Thaw sealed bags in a bowl of cold water (never left out at ambient temperature) or move them to the fridge the night before you need them, and reheat gently in a pot of simmering water or directly on low heat once thawed.
For genuinely rough conditions, keep a short list of dump-and-go meals ready: pre-chopped vegetable and protein packs that go straight into one pot with stock or sauce, no knife work required once you’re underway. A bag of diced onion, carrot, and celery, a sealed portion of pre-cooked rice, and a can of beans is a full meal that takes five minutes of actual cooking.
Two serving systems are worth setting up before you leave the dock. A thermos of hot soup or stew filled before a night watch keeps the on-duty crew fed without anyone needing to fire up the stove in the dark. A cockpit-accessible snack box, nuts, dried fruit, granola bars, keeps hungry crew out of the galley (and out of each other’s way) during busy sailing.
Readers planning day trips or shorter charters might also want lighter, grab-and-go options; Sailarmada’s collection of yacht food ideas for day trips and parties covers snack-forward menus that pair well with this make-ahead approach.
How Do You Cook Safely When the Weather Turns?
Cooking underway is a different discipline from cooking at anchor, and the gap between the two is where most galley injuries happen. A short safety checklist covers the essentials: brace yourself with a galley strap if your boat has one, wear long pants and closed shoes even in warm weather, never fill a pot more than two-thirds full, and keep a burn kit within arm’s reach of the stove at all times.
Some cooking methods simply don’t belong on a moving boat in rough conditions. Skip deep-frying entirely, since hot oil and a rolling deck are a dangerous combination. Skip multi-step plated dishes that need everything to come together at once. Skip any recipe demanding precise knife work while you’re being tossed side to side; that’s how galley cuts happen.
What works instead is exactly what you should have already prepped: a big pot of stew made in calm water before the weather turned, held hot in a thermos, or reheated gently on a single burner with the lid on. A pressure cooker earns its keep here, because its locked lid means you can cook safely even with real motion, without a single spill.
- Keep pots filled to two-thirds capacity or less, always.
- Use pot restraints or a gimbaled stove whenever conditions get lively.
- Reheat rather than cook from scratch once seas pick up.
- Keep a fire extinguisher and burn kit within reach of the stove, not stowed away.
Pro Tip: Build a “passage-day prep window” into your schedule, an hour or two of calm water specifically set aside for chopping, portioning, and vacuum-sealing the next 48 hours of meals. Treat it as a scheduled task, not something you’ll get to if there’s time.
How Do You Keep Food Safe Without a Full-Size Fridge?
A small boat fridge runs warmer and less consistently than a home refrigerator, so food safety aboard depends on discipline, not just equipment. Check your fridge temperature with a simple thermometer rather than trusting the dial, and keep dairy and raw meat on the coldest shelf, typically the back or bottom of a top-loading unit.
Eggs deserve a specific note: unwashed, unrefrigerated eggs (common in many countries outside the US) actually keep longer at room temperature than washed, refrigerated ones, because washing strips the natural protective coating. If you can source unwashed eggs, they’re a genuinely useful pantry item that doesn’t compete for fridge space.
Your freezer is where batch-cooked, vacuum-sealed meals live, and it should be packed as full as possible; a fuller freezer holds cold longer than a half-empty one. Using large ice blocks in an insulated cooler is a proven backup when built-in refrigeration is limited or absent, since block ice lasts far longer than cubed ice and keeps a cooler cold for days rather than hours.
If refrigeration fails outright, work through a clear sequence: consume the most perishable items first (dairy, raw meat, soft produce), transfer anything salvageable into an insulated cooler with whatever ice or frozen items you have, and fall back on shelf-stable pantry meals, canned proteins, rice, pasta, until you can restock or repair the system. Keep a small emergency stash of canned goods and dried meals specifically for this scenario; don’t count your everyday pantry stock as your backup plan.
- Check fridge and freezer temperatures daily with an actual thermometer, not by feel.
- Store raw meat and dairy on the coldest shelf, away from the door.
- Pack the freezer full; empty space works against you.
- Keep a small emergency shelf-stable stash separate from your regular pantry rotation.
Some food-safety complaints in cruising forums trace back to the same root cause: nobody tracked how long something had been open or thawed. A simple dating and rotation system solves most of it, a piece of masking tape and a marker is all it takes.
Pro Tip: Assign each storage zone (fridge shelf, freezer drawer, dry locker) a rough “eat by” window when you stow groceries, then work through zones in that order rather than just grabbing whatever’s on top.
How Should You Organize Food Storage on a Small Boat?
Where you put food matters almost as much as what food you bring. Heavy items, canned goods, water jugs, glass jars, belong low and as close to the boat’s center as possible, since weight up high or far forward and aft affects how the boat handles and how comfortable the ride feels.
Sketch a simple stowage map before you load anything: mark which lockers hold heavy pantry items, which hold daily-use ingredients you’ll reach for constantly, and which are reserved for the vacuum-sealed meals you’re saving for later in the trip. Keep daily-use items in the most accessible locker so you’re not unpacking half the boat to find the coffee.
A few habits prevent the most common small-boat storage failures. Wrap glass jars in a dish towel or foam sleeve before stowing so they don’t crack against each other in a swell. Dry fresh produce completely before storing it; residual moisture is what causes bruising and early rot, not the boat’s motion. Store anything grain-based or snack-related in truly airtight containers, since boats attract pests far more easily than a home pantry does.
- Sketch your stowage map before loading, marking heavy, daily-use, and reserve locker zones.
- Load heavy items first, low and central, then daily-use items in the most reachable spots.
- Label every container and locker with contents and date, so nobody has to open five lockers to find dinner.
- Do a quick locker-access check each morning: pull what you need for the day’s meals in one pass, rather than returning to the galley locker repeatedly.
Sailarmada’s guide on provisioning for family sailing trips walks through stowage mapping in more detail if you’re planning a longer trip with multiple crew or kids aboard.
What Should a 7-Day Yacht Provisioning List Look Like?
Rough quantities per person per day give you a starting point that scales with crew size: about 2 to 3 liters of water beyond cooking needs, 1 to 2 pieces of fruit, one serving of vegetables outside the main meal, one protein portion, and a handful of snacks. Double the snack allotment if you’ve got teenagers or long, low-activity passage days on the itinerary.
A sample 7-day menu, sequenced so the most perishable items get eaten first:
| Day | Meal Focus | Prep Complexity | Storage Type |
|---|---|---|---|
| 1 | Fresh salad with grilled fish | Low, cook fresh | Refrigerated, fresh produce |
| 2 | Pasta with fresh vegetables and cheese | Low, cook fresh | Refrigerated, pantry |
| 3 | One-pot chicken curry (precooked) | Reheat only | Frozen, vacuum-sealed |
| 4 | Beef stew with hardy vegetables | Reheat only | Frozen, vacuum-sealed |
| 5 | Chili with rice | Reheat only | Frozen, pantry |
| 6 | Canned tuna and bean salad | Low, assemble | Pantry, hardy fresh |
| 7 | No-knead pot bread with canned soup | Low, cook fresh | Pantry |
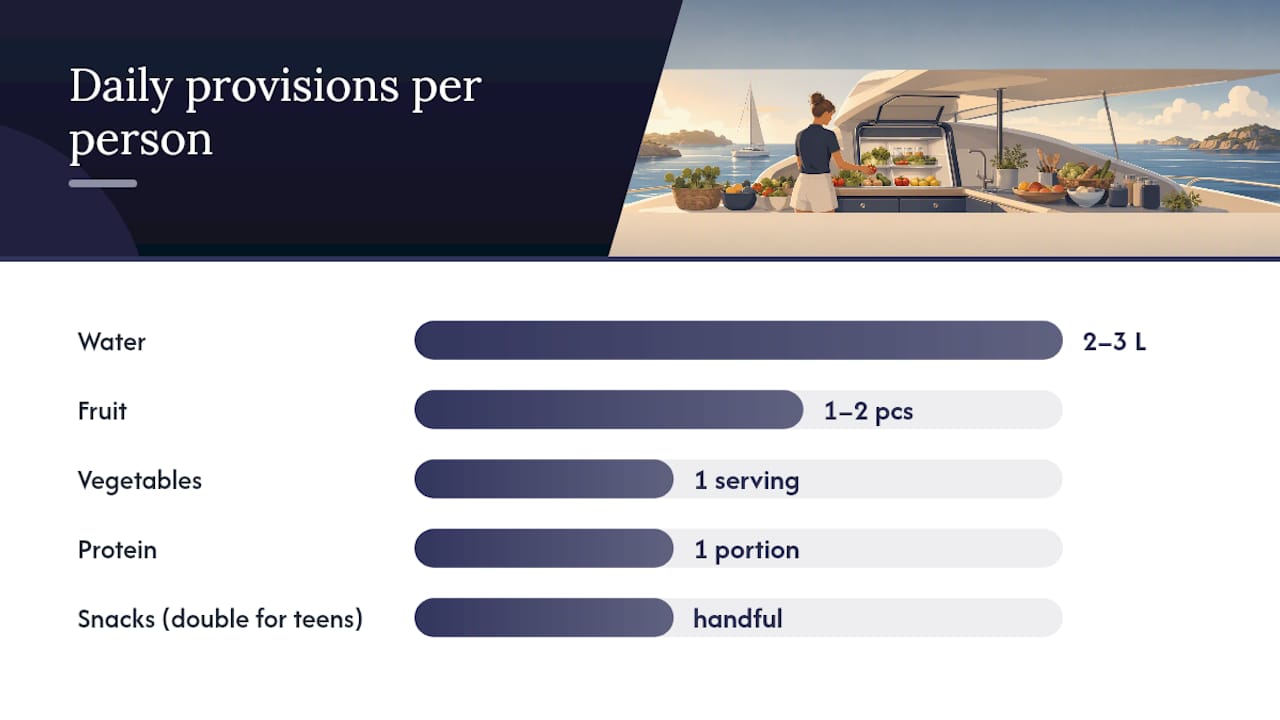
Split your shopping list the same way you’ll stow it. Refrigerator: cheese, fresh fish or chicken for early meals, condiments, dairy. Freezer: precooked stews, curries, and chili in vacuum-sealed portions; bread if space allows. Pantry: rice, pasta, canned beans and tuna, coconut milk, oils, dried herbs, crackers. Keeping four to six cans of a versatile ingredient like coconut milk on hand means it can slide into curries, soups, or even coffee without taking up extra planning effort. Fresh produce: cabbage, carrots, onions, apples, and citrus for the back half of the week, plus whatever soft produce you’re eating in the first few days.
If a specific item isn’t available at your provisioning stop, substitute within the same category rather than changing the whole dish: swap chicken for firm white fish, swap fresh herbs for dried, swap one canned bean for another. Sailarmada’s shopping guide for a week of sailing offers a longer version of this list if you’re provisioning for a full week or a larger group.
How Do You Clean Up and Manage Waste With Limited Water?
Freshwater is the scarcest resource on most small boats, so the cleanup routine has to protect it. Start with a sea-water prewash to knock off the worst of the grease and food residue, then finish with a short freshwater rinse. This sea-water-then-freshwater sequence is standard practice among experienced cruisers precisely because it cuts freshwater use dramatically without sacrificing sanitation. Wash as you go rather than letting dishes pile up; a stack of dirty pots at the end of a long sailing day is far harder to tackle than a few items rinsed between courses.
Budget roughly a few liters of freshwater per person per day for drinking, cooking, and cleaning combined, more if you’re not running a watermaker. If your boat has a watermaker, treat it as a convenience, not a guarantee, and keep enough bottled or tanked backup water for at least a couple of days in case it fails.
- Prewash dishes in sea water to remove grease and food debris.
- Finish with a short freshwater rinse, using as little as the job requires.
- Compact and bag food waste; peel labels off cans before disposal so they don’t clog compactors or attract pests.
- Store non-biodegradable waste securely for proper onshore disposal rather than discarding it overboard.
- Wash as you go to avoid a backlog of dishes.
- Keep a dedicated saltwater bucket and scrub brush near the galley sink.
- Separate compostable scraps from packaging waste at the source, not later.
What Really Works After a Few Days of Rough Cooking
The trip that taught me the most about galley planning wasn’t the calmest one. Three days into a passage, with the swell picking up and nobody in the mood to cook, the crew ran entirely on a stew that had been made and vacuum-sealed before we left the dock, reheated in fifteen minutes and served straight from a thermos to whoever was on watch. Nobody touched a knife for two days, and morale barely dipped.
The lesson that stuck: ambitious cooking belongs in calm-weather windows, not mid-passage. Carry a compact burn kit and a galley strap even on short trips, because the day you skip them is usually the day you need them.
Where to Learn More About Provisioning and Galley Safety
A few sources go deeper into specific pieces of this playbook if you want more detail before you shop. The offshore galley guide from Bluewater Navigator covers front-loading and pressure-cooker technique in more depth, while American Sailing’s guide to cooking at sea is the clearest resource on galley safety gear. For balanced, portable menu ideas beyond the boat, Wild Foodz’s holiday eating guide offers useful substitution ideas that translate well to a galley setting.
Frequently Asked Questions
How do you prepare meals on a yacht with a small galley?
Prioritize a two-burner-friendly menu built around one-pot dishes, precook and vacuum-seal several days of meals before departure, and sequence your shopping list so the most perishable produce gets eaten first.
What’s the best food to bring on a sailing trip?
Hardy vegetables (cabbage, carrots, onions), canned proteins, rice and pasta, and versatile pantry staples like coconut milk that work across multiple dishes. Save soft fruit and leafy greens for the first few days.
How do you keep food fresh on a yacht without much refrigeration?
Use insulated coolers packed with large ice blocks, freeze batch-cooked meals flat in vacuum-sealed bags, and eat the most perishable items first. Unwashed eggs also keep well without refrigeration.
Can you cook safely on a yacht in rough weather?
Yes, if you stick to reheating pre-made one-pot meals rather than cooking from scratch, keep pots two-thirds full or less, use a galley strap, and avoid deep-frying or precise knife work entirely.
How much food should you buy per person for a week of sailing?
Plan roughly one to two pieces of fruit, one extra vegetable serving, one protein portion, a carb base, and 2 to 3 liters of drinking water per person per day, with extra pantry snacks for longer or more active trips.
Sources
- The offshore galley: feeding a crew when the world won’t stop moving — Bluewater Navigator
- Charter yacht dining 2026 — GetBoat blog
- Cooking at sea — American Sailing